qControl
You can use qControl to interact with the Quarto via a web browser and display data and edit variables, etc. To access the web-application, go to qcontrol.qnimble.com.
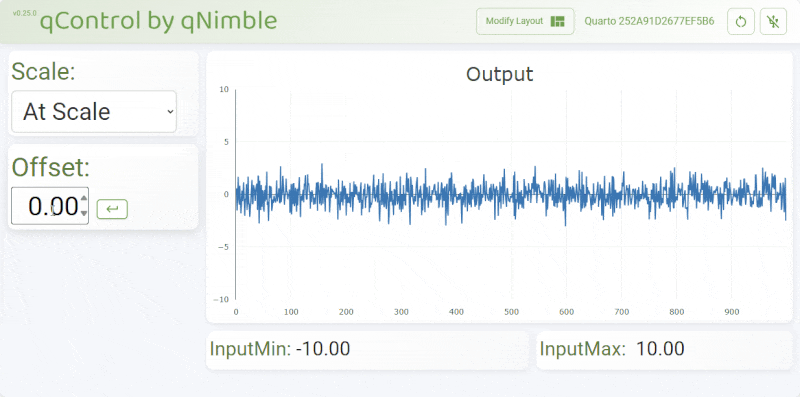
This example program will add an offset and scaling factor to what is read on Analog Input 1 and output that signal on Analog Output 1 and graph that data on the web-application. Additionally, it will have two indicators indicating the minimum and maximum input values that can be input without causing the output to saturate.
#include "qCommand.h" // load the qCommand (and smartData) library

const uint16_t dataPoints = 1000;
float dataArray[dataPoints];
SmartData<float*> Data(dataArray); // SmartData array of floats to hold the data

// Set list of scalings with string description
Option<float> ScaleOptions[] {
  {0.5, "Divide by 2"},
  {1, "At Scale",},
  {2, "Multiply by 2"},
  {3, "Multiply by 3"}
};

// Create scale SmartData object that must be set to one of the ScaleOptions
SmartData<Option<float>*> scale(ScaleOptions);

SmartData<float> offset(0);
SmartData<float> input_min(0);
SmartData<float> input_max(0);

qCommand qC; // instantiate the qCommand object

void setup() {
  configureADC(1,5,0,BIPOLAR_10V,getADC1); // Have ADC take measurement every 5 µs, ±10 V range

  //Set the default configuration for qControl
  static FLASHMEM const char layout[] = R"""({"0":{"s":{"i":0.1,"a":true,"d":1},"i":"0","x":0,"y":0,"w":3,"h":2,"c":"Scale"},"1":{"s":{"i":0.25,"a":true,"d":2},"i":"1","x":0,"y":2,"w":3,"h":2,"c":"Offset"},"2":{"s":{"d":2},"i":"2","x":8,"y":6,"w":4,"h":1,"c":"InputMax"},"3":{"s":{"d":2},"i":"3","x":3,"y":6,"w":5,"h":1,"c":"InputMin"},"4":{"mw":3,"mh":3,"i":"4","x":3,"y":0,"w":9,"h":6,"c":"Output"}})""";
  qC.setDefaultLayout(layout);

  //Assign names to data and variables
  qC.assignVariable("Scale", &scale);
  qC.assignVariable("Offset", &offset);
  qC.assignVariable("InputMax", &input_max, true); // last argument sets this as an indicator and not a control
  qC.assignVariable("InputMin", &input_min, true); // last argument sets this as an indicator and not a control
  qC.assignVariable("Output", &Data);

  offset.setLimits(-10,10); // Force offset to be between -10 V and 10 V
  offset.runOnUpdate(recalcRange); // when offset changes, recalculate the input min and max value
  scale.runOnUpdate(recalcRange); // when offset changes, recalculate the input min and max value
}

void loop() {
  qC.readBinary(); // This is what communicated with the qControl web-application
  qC.readSerial(Serial2); // You can also use qCommand via the Serial port(s) to read / write variabales
}

void recalcRange(void) {
  input_min = max(-10.0f,(-10.0f - offset ) / scale);
  input_max = min(10.0f,(10.0f - offset) / scale);
}

void getADC1(void) {
  float newadc = readADC1_from_ISR(); //read ADC voltage
  float dac = newadc * scale + offset; // calculate dac output
  writeDAC1(dac); // write dac
  Data.setNext(dac); // store dac value in data array
}
After loading this program, connecting to the Quarto via qcontrol.qnimble.com shows the following user interface. Note that in the video below, a broadband noise source was input into Analog Input 1 on the Quarto.
For more information on using qControl, look at the qControl Tutorial and the main qControl page.